[IsaacLab Part 1] Unitree Go2 URDF import
Isaac Lab을 설치하고 Unitree Go2 URDF를 Isaac Sim scene에 load하는 과정을 정리한다.
[IsaacLab Part 1] Unitree Go2 URDF import
isaaclab install
먼저 isaaclab을 설치해줍니다. isaaclab.assets에 모든 robot의 configuation file이 있기 때문에 우리는 그 파일로 isaacsim에서 로봇을 load해보겠습니다.
script 작성
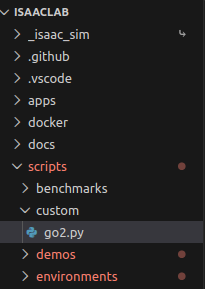
먼저 isaaclab파일 안의 script에 custom폴더를 만들고 go2 로봇을 load 할 수 있는 파이썬 파일을 하나 생성했습니다.
scripts > tutorials > 00_sim > create_enpty.py와 scripts > demo > quadrupeds.py를 조합하여 빈공간에 go2 로봇개를 load하는 코드를 작성하였습니다.
1
2
3
4
5
6
7
8
9
10
11
12
13
14
15
16
17
18
19
20
21
22
23
24
25
26
27
28
29
30
31
32
33
34
35
36
37
38
39
40
41
42
43
44
45
46
47
48
49
50
51
52
53
54
55
56
57
58
59
60
61
62
63
64
65
66
67
68
69
70
71
72
73
74
75
76
77
78
79
80
81
import argparse

from isaaclab.app import AppLauncher

# create argparser
parser = argparse.ArgumentParser(description="go2 scene")
# append AppLauncher cli args
AppLauncher.add_app_launcher_args(parser)
# parse the arguments
args_cli = parser.parse_args()
# launch omniverse app
app_launcher = AppLauncher(args_cli)
simulation_app = app_launcher.app

"""Rest everything follows."""
import numpy as np
import torch
import isaaclab.sim as sim_utils
from isaaclab.assets import Articulation

from isaaclab.sim import SimulationCfg, SimulationContext
from isaaclab_assets.robots.unitree import UNITREE_GO2_CFG


def main():
    """Main function."""

    # Initialize the simulation context
    sim_cfg = SimulationCfg(dt=0.01)
    sim = SimulationContext(sim_cfg)
    # Set main camera
    sim.set_camera_view([2.5, 2.5, 2.5], [0.0, 0.0, 0.0])
    # Ground-plane 생성
    cfg = sim_utils.GroundPlaneCfg()
    cfg.func("/World/defaultGroundPlane", cfg)
    # Lights
    cfg = sim_utils.DomeLightCfg(intensity=2000.0, color=(0.75, 0.75, 0.75))
    cfg.func("/World/Light", cfg)

    # go2 articulation을 로드합니다.
    go2 = Articulation(UNITREE_GO2_CFG.replace(prim_path="/World/go2"))

    # 로봇 데이터에 접근하기 전에 simulator를 먼저 실행해줍니다.
    #
    '''Articulation 객체가 완전히 유효한 시뮬레이션 데이터를 담기 위해서는
      객체 생성 후 시뮬레이션이 최소 한 번 재설정(Reset)되거나 스텝(Step)이 수행되어야 합니다.'''
    sim.reset()

    root_state = go2.data.default_root_state.clone()
    # 로봇의 초기 pose의 위치와 방향을 입력해줍니다.
    go2.write_root_pose_to_sim(root_state[:, :7])
    # 로봇의 속도, 가속도를 입력해줍니다.
    go2.write_root_velocity_to_sim(root_state[:, 7:])
    joint_pos, joint_vel = go2.data.default_joint_pos.clone(), go2.data.default_joint_vel.clone()
    # 로봇의 초기 joint state를 입력합니다.
    go2.write_joint_state_to_sim(joint_pos, joint_vel)
    # 로봇을 reset하여 로봇의 이전 상태에 대한 정보를 없앱니다. (강화학습을 위해)
    go2.reset()

    # generate random joint positions
    joint_pos_target = go2.data.default_joint_pos
    # apply action to the robot
    go2.set_joint_position_target(joint_pos_target)
    # write data to sim
    go2.write_data_to_sim()


    # Now we are ready!
    print("[INFO]: Setup complete...")

    # Simulate physics
    while simulation_app.is_running():
        # perform step
        sim.step()


if __name__ == "__main__":
    # run the main function
    main()
    # close sim app
    simulation_app.close()
go2를 isaac sim에 load한 모습
- 로봇에게 초기 joint포즈를 입력해줬지만 땅에 떨어지면서 포즈를 유지하지 못하고 넘어지는 모습입니다.
- 초기 joint pos를 계속 입력해주거나 가만히 서있을 수 있는 policy를 적용해주면 될 것으로 생각됩니다
이 기사는 저작권자의 CC BY 4.0 라이센스를 따릅니다.